
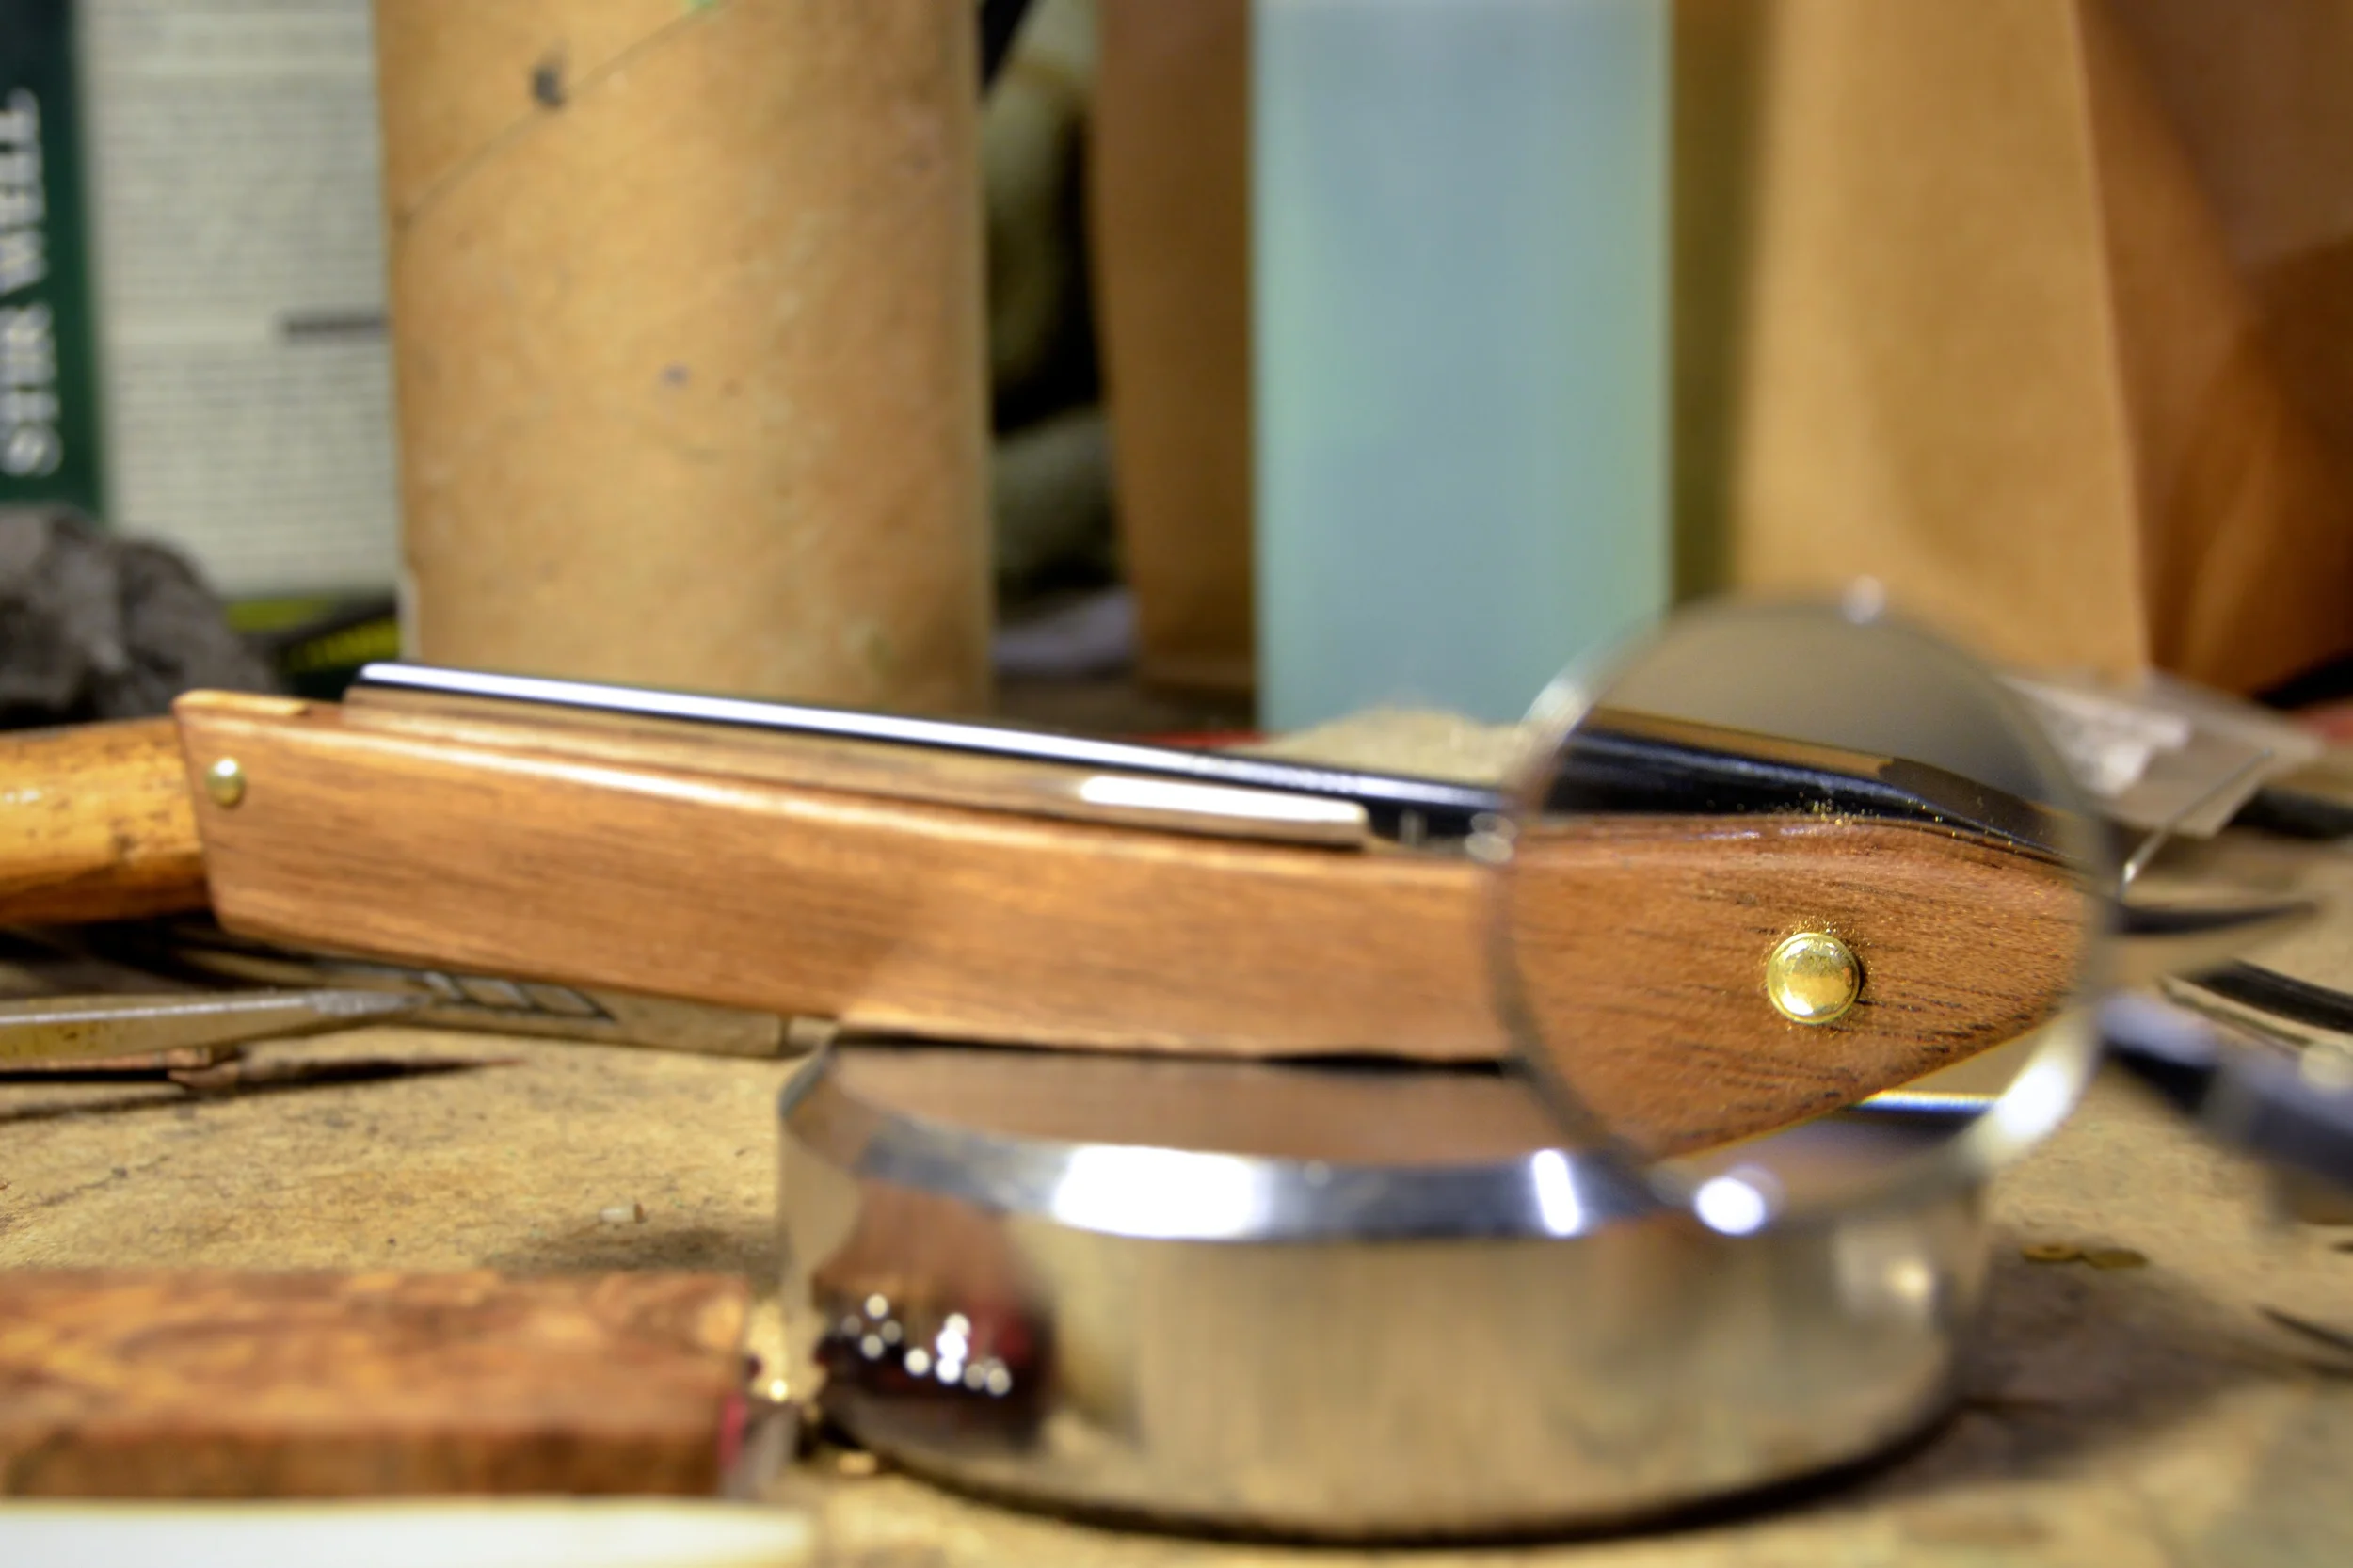
Straight Razor Pin, Closeup
What is a pin?
Traditional Straight Razors have two distinct parts: the blade and the scales. This article is focused on the joining of those two parts, namely the pins where the blade and scales meet.
What we call the “pin” is essentially a solid, or round head rivet; a permanent mechanical fastener consisting of a simple rod and a head which is deformed with a hammer. It’s a simple technology with a noble history, dating as far back as the Bronze Age; it was even used to make the legendary Viking longships! In what is called clinker boat building, Vikings used an iron nail driven between overlapping planks and rounded the exposed end with a hammer in a process called clenching.
Hand-pinning achieves spectacular results and is well worth the added effort. Sure, it’s tedious work; our 1/16” pins and washers are hard to hold and easy to lose, and never mind the unsecured straight razor blade swinging round your fingers! But the results are beautiful and secure compared to modern screws and rivets. Not only that, but they can easily be readjusted without disassembly.
Pins for straight razor and knife making are most commonly made of brass, nickel/silver alloys, and stainless steel. We use brass pins because we like the way they look and feel. Regardless of the material, pins sometimes come loose and will need to be retightened. Pins become more and more problematic as they loosen, causing ‘play’ at the hinge which can irrevocably damage the scales and pins. The scale material will weaken and the head of the pin will be forced to expand outward to accommodate the new range of motion, until you end up with cracked or broken scales and a useless pin that cannot be salvaged. For these reasons, it’s much easier to maintain your straight razor by periodically tightening the pin than it is to replace or restore badly damaged pins and scales.
Why Pins Come Loose.
Pins work primarily by pinching from either side of the joined pieces, and to a lesser degree by expansion within the scales. Tension is lost over time usually because the pin wasn’t peined tightly to begin with, but the scales can also deform and become compromised due to friction, corrosion, mold, etc. The most common cause of lost tension is friction from regular use, and anything short of an actual breakage is quite easy to fix on your own!
How to Diagnose and Fix Problem Pins
Tight straight razor pins that make it difficult to open or close the razor can be loosened simply by creating friction: opening and closing the straight razor a lot (we actually recommend this as a way for your to become familiar with a new razor, and to break in the pin). Conversely, too much friction over time will loosen the pin. Consciously take note of how easily your razor opens before each shave, and of how well it stays open on its own. Any ‘play’ side to side in the hinge will eventually cause the razor to open and close off-track and should be addressed immediately.
Tightening the straight razor’s pin is quite simple. However, there are times when simply tightening the pin should be avoided.
Do NOT tighten the pin if:
- The scales have any cracks or breakage around the pin.
- The pin is recessed within the scale material due to over-tightening.
- The pin’s head is flattened and brittle.
- The pin is visibly broken or cracked.
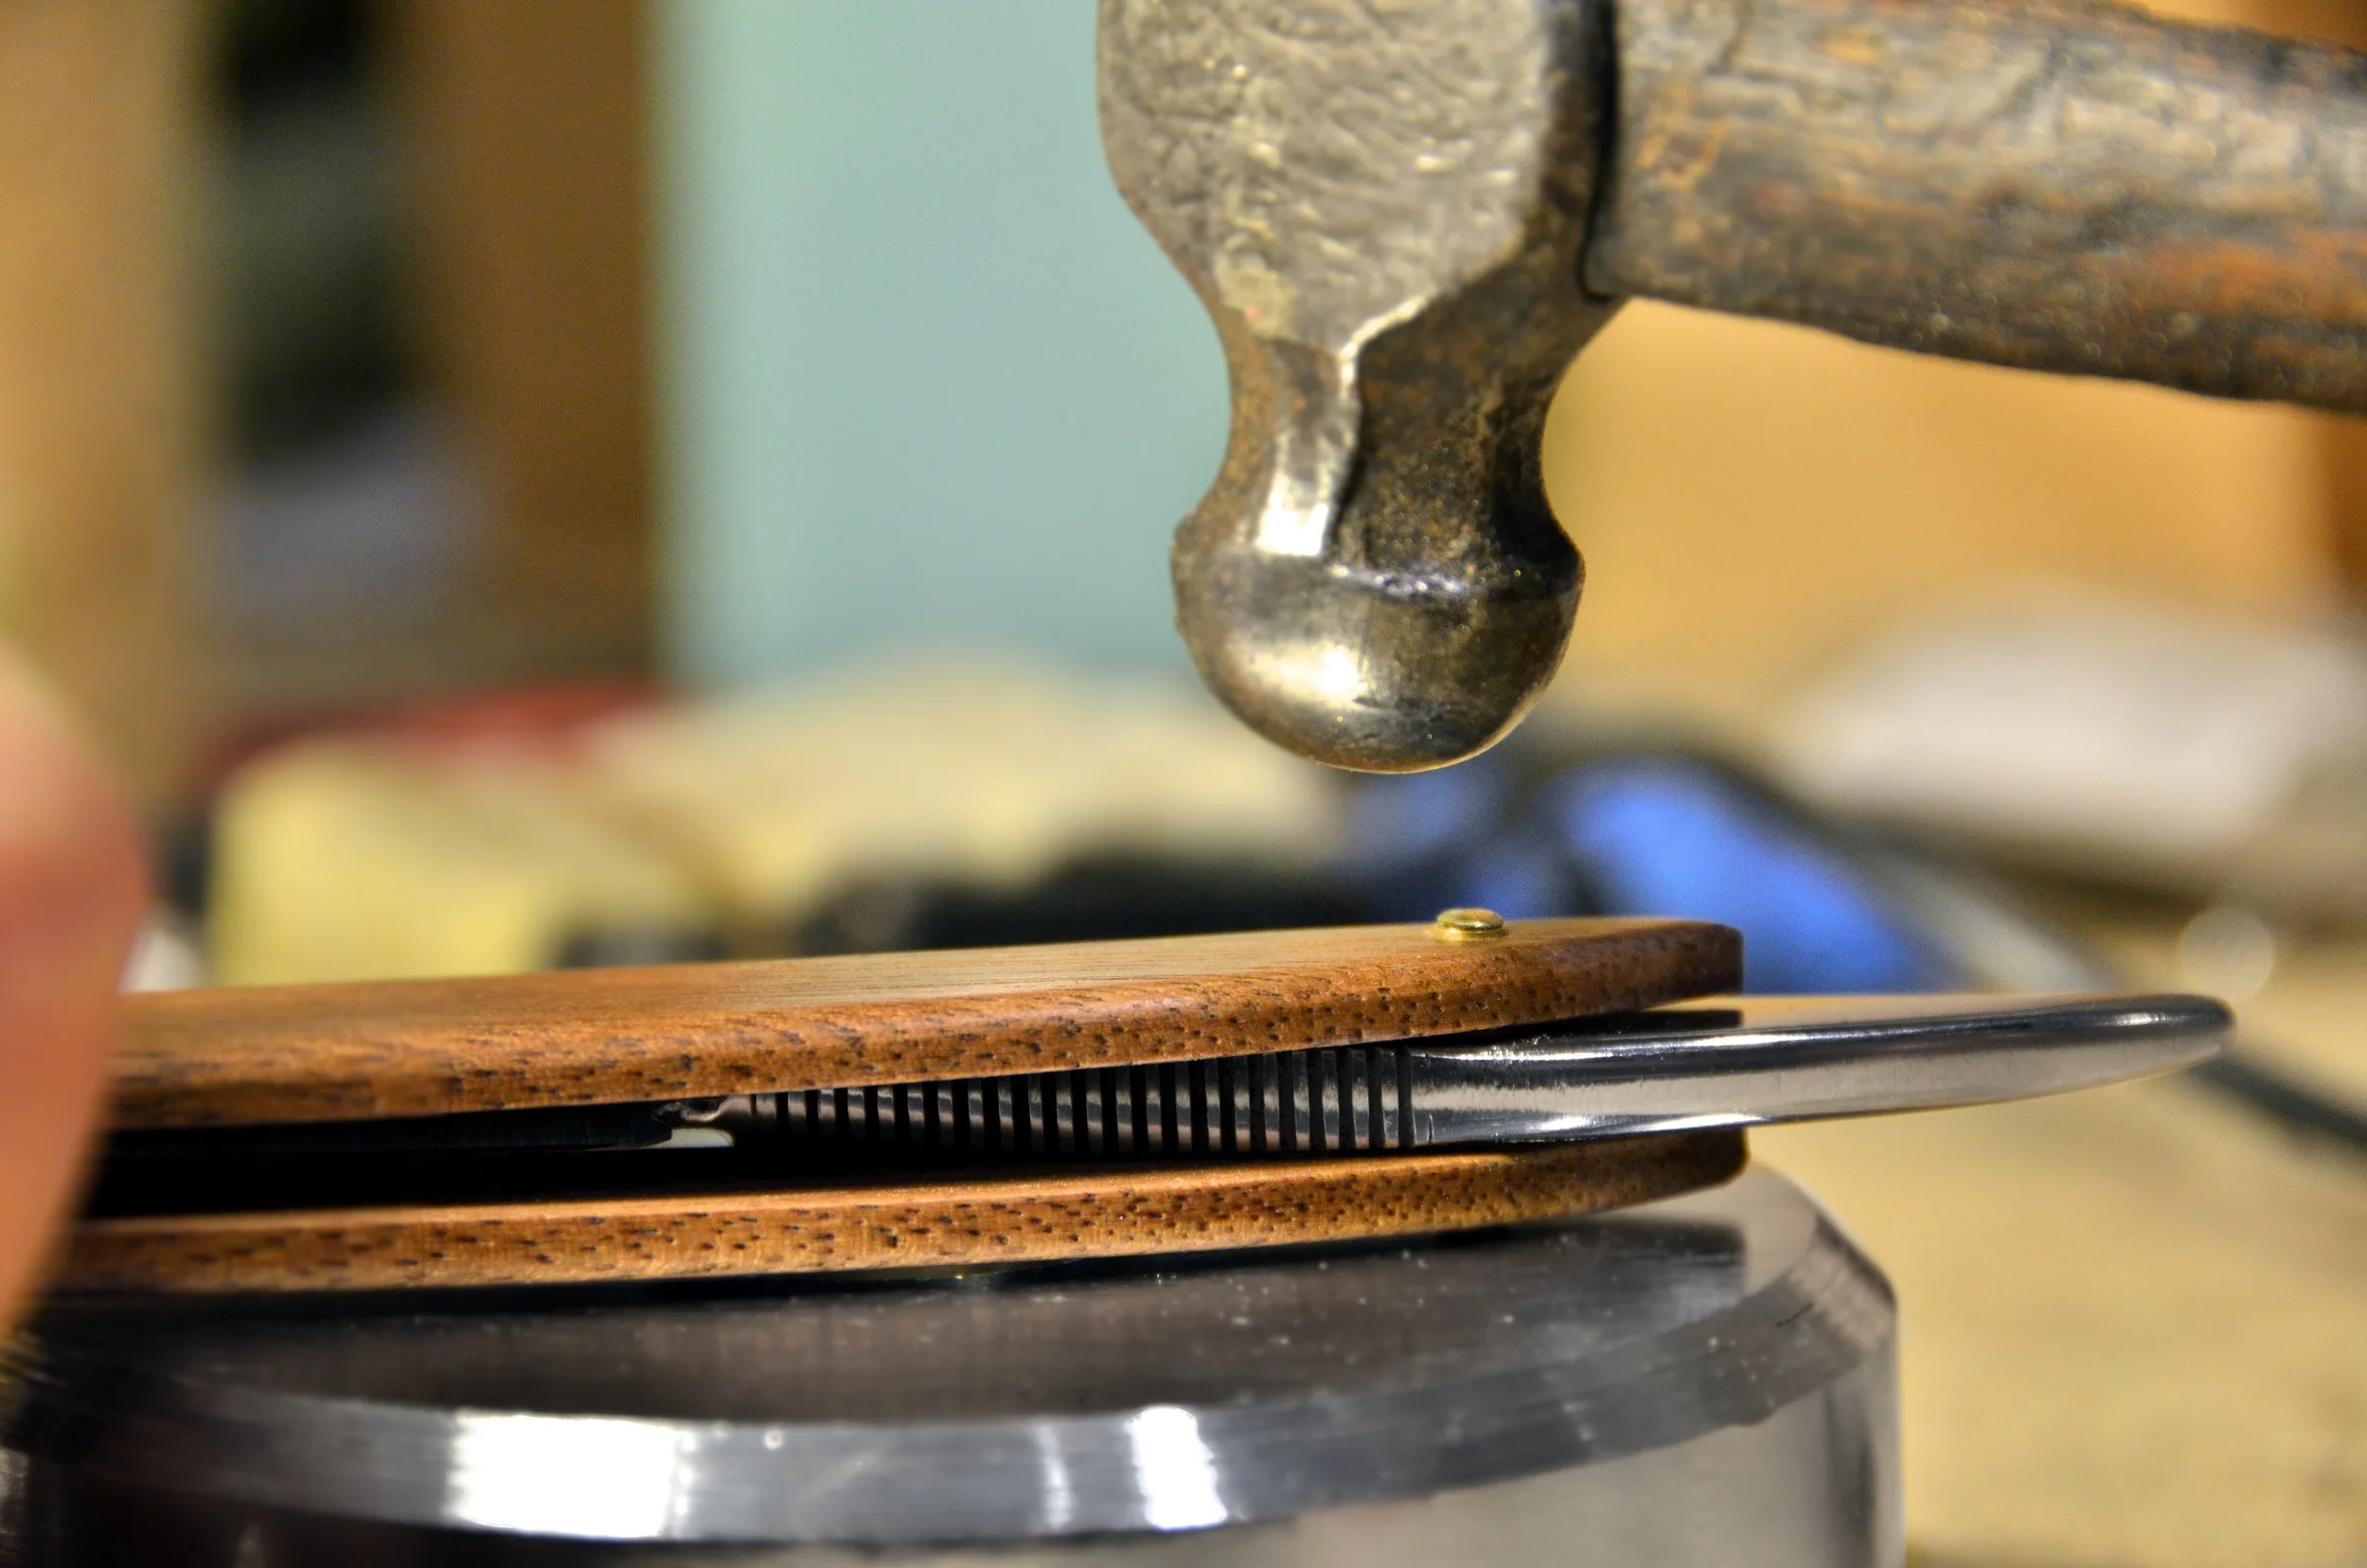
A razor with any of the above problems will eventually need re-pinning (read below). If the pin itself looks to be in good condition and there is no damage to the scales, you are clear to start tightening the pin. You will need a small hammer (ideally a rounded ball-pein hammer) and a jeweler’s anvil or other hard surface.
Peining
Tightening the pin:
- With the straight razor closed, place it on it’s side, balancing the pin on the anvil.
- With the hammer, give the pin a few firm taps. Alternatively, you can pein it gently with the rounded portion of your ball-pein hammer with light, circular taps. Take care not to strike the scales!
- Flip the razor over and repeat on the opposite side. This will keep the straight razor centered in the scales.
- Open and close the razor to test the tension. If you feel no change, tap a few more times on either side.
- Repeat until you have achieved the desired tension. At Portland Razor Co., we gauge tension by whether or not the razor can strike a pose, balancing upright on the tail and scales without closing.
Re-Pinning:
Sometimes a pin or the scales simply can't be salvaged, in which case the pin will have to be entirely replaced. Because the pin is a permanent fixture, it will have to be destroyed for removal either by filing, grinding, or drilling it out. Take extra care during removal if you plan to reuse the same scales! Once you the old pin is removed, you can replace it with new brass rod and a few washers.
At Portland Razor Co. for each production razor we use
- 1/16-inch brass rod
- 2 x #0 washers
- 2 x Wide washers
- ball-pien hammer
- metal file
- diagonal cutters
- Assemble the razor on the length of brass rod with the #0 washers on the outside, then the scales, then wide washers between the scales and blade.
- Leaving about 1/16" on either side, cut the brass rod with the diagonal cutters.
- File one end of the brass rod so it is flat on top.
- Pein one end of the brass rod. Go slowly and use light taps around the edge of the rod, rather than hitting it centered, so it will lie down smoothly.
- Flip the razor over and ensure that the washers are still in place. Pein the opposite side.
- Continue peining, alternating sides, until both sides of the pin are smooth and good tension is achieved.
Or, you can send it to our shop in Portland...
Long Term Care
Some straight shavers choose to oil their pins to smooth the action of the hinge and preserve the metal, and there’s something to be said for going the extra mile here. However, a small amount of corrosion on the brass can actually help keep the hinge tight, and won’t normally penetrate enough to compromise the integrity of the brass or steel. If you decide to store your straight razor for a long time, it would be beneficial to apply a light coat of oil and work it into the action of the hinge, lubricating the pin and preventing deep rust.
Regularly tighten the pins on your straight razor for the same reasons you strop the blade at every shave. A straight razor that is well-stropped between shaves will keep its edge longer and is easier to restore to a keen edge than one that has been shaved with multiple times without stropping. Similarly, tightening a pin which is only a little loose is much easier and safer than trying to tighten a razor with wobble and breakage. It’s the sum of many tiny efforts over time that add up to the greatest overall experience, and will help you get the most out of your straight razor.