
So, you’ve decided to start shaving with a straight razor- Welcome! There’s a lot to learn, and we’re here to help you have the best experience possible. This article covers everything you need to get into your first straight razor shave, from supplies and setup to actually shaving for the first time.
Setup
The first step to getting a great straight shave is having the right tools. Quality pieces will deliver the best results and last a lifetime with proper care. We've already written about the myth of the 'beginner' razor. And, since you are on our blog, I hold no hesitation in injecting some self promotion here: every razor we offer on our site is of great quality!

Hardware, the stuff that works forever:
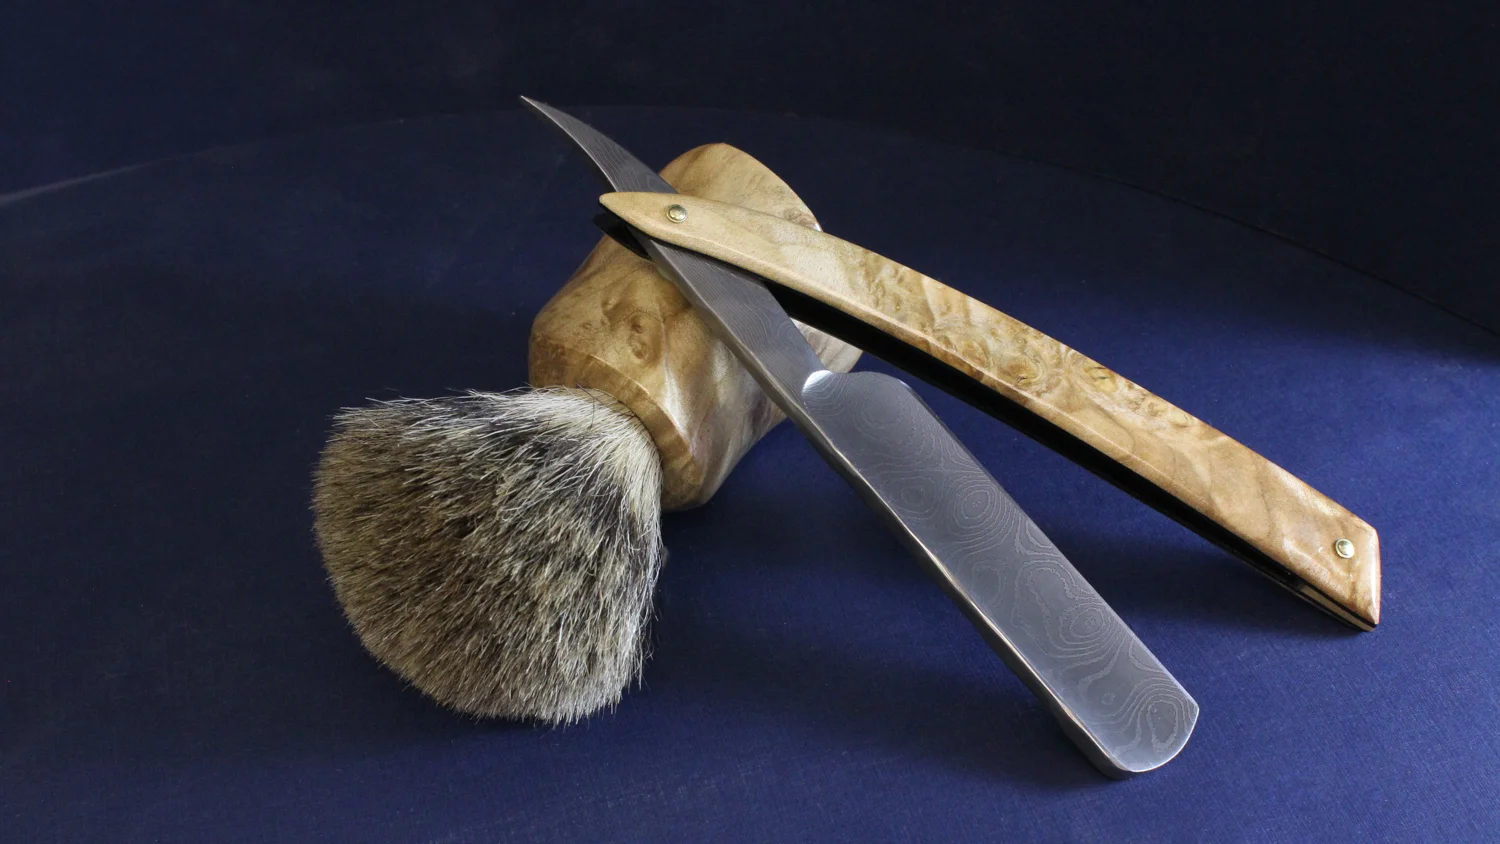
- Straight Razor - your razor should be clean, sharp, and free of rust before every shave.
- Strop - maintenance tool used used to draw out your razor's edge so it stays shaving-sharp.
- Shave Brush - a shave brush helps form a lather with your shave soap and provides exfoliation before the shave.
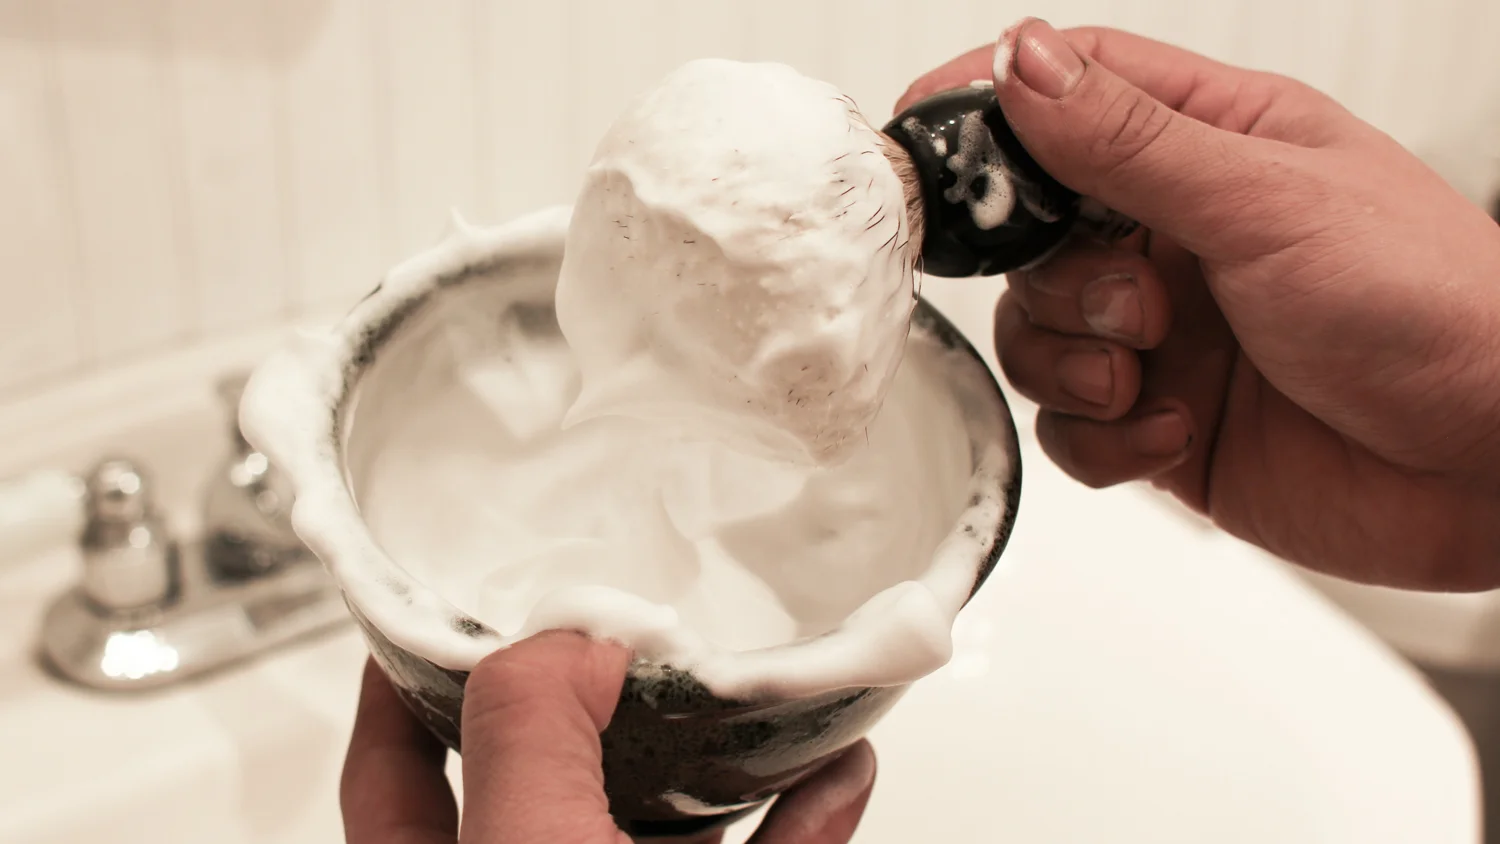
- Shave Mug/Bowl/Scuttle (optional) - These help you fine-tune your shaving lather by allowing you to control the water-to-soap ratio, while also giving you a reservoir to keep extra lather during the shave. It also makes your bathroom look very fancy.
- Clean, dry hand towel or washcloth.
Software, the stuff you'll need to restock at some point:
- Pre-Shave Conditioner (recommended) - Especially with course hair, conditioning will prove to be extremely effective for softening hair.
- Shave Soap - Use a soap designed for shaving. Such a soap will make a protective barrier between your skin and the blade, soften hairs, and help the hairs stand up to be cut.
- Alum Block or Styptic Matches (recommended) - Alum is an astringent and antiseptic in solid form. This can be used to make your skin tacky and easier to grip (more on this later). It is also helpful in treating minor nicks and cuts from shaving. It can also be used as an aftershave treatment. One alum block should last years! Styptic matches are a convenient, single-use alternative.
- Aftershave (recommended) - Aftershave contains mild antiseptics and astringents which cool and tighten the skin, relieve irritation, and prevent minor skin infections that commonly cause razor burn and razor bumps.
Before the Shave:
- Set up somewhere clean, well-lit, and free from distractions. Have a safe place to set your razor down.
- Inspect the razor. Check that the scales are intact and get a sense for the tightness or looseness of the pin. Make sure the blade is free of rust and that the cutting edge looks smooth and not chipped.
- Strop the razor. Start with the prep side, then move to the finishing side.
- Give your hair plenty of time to hydrate and soften. A hot shower or soaking with several hot towels is a good way to do this. Use this time to feel your hair and take note of the direction or “grain” of their growth. For the most gentle shave, you want to start by shaving with the direction of hair growth. For a closer shave, you can shave across or even against the grain. It may be helpful to divide the shaving area into “zones” based on which direction the hair grows, shaving one zone at a time.
- Lather Up. If using a shaving brush, load the tip with cream and slowly add water, agitating the bristles until a thick lather with tiny bubbles forms.

Your First Straight Shave // the face
- Apply Pre-Shave Conditioner. Dispense a dime-sized amount of conditioner onto your palm. Rub your hands together and massage into the skin and hair, removing any excess with a moist towel. Allow essential oil fragrance to bloom and cool the skin for a soothing, aromatic shaving experience.
- Grip the razor. Two fingers in front, two in back, with the thumb underneath. Use a firm but gentle grip, like a handshake. At the end of the day, the grip that works is the right one, but this is a good place to start. When you put the blade to your skin, keep it moving and use an angle 15-30 degrees off your skin. This should go without saying, but: no slicing motions!
- Gently pull the skin tight. This creates a firm surface for the razor to cut the hair against and will result in a smoother shave. You can also pull your skin in different direction to shave hard-to-reach areas like under the jaw or on either side of the throat. If your skin is too slippery to pull effectively, you can swipe your fingers on an alum block to make them stick to your skin better.
- The First Pass. Start with the flat part of the cheeks, pulling the skin tight and bringing the razor downward in short, controlled strokes. If this goes well, proceed to the jaw, neck, upper lip, and then chin. Shave in the direction of hair growth, and only shave where there is lather! If some whiskers are left behind, don’t worry, you can get them on the next pass after you re-lather.
- Rinse, Re-lather, Second Pass. Shaving only where there is lather will minimize irritation and give better results. Shave with the grain or across the grain for a closer second pass, catching any whiskers you may have missed.
Your First Straight Shave // the legs
- Apply Pre-Shave Conditioner. Dispense a dime-sized amount of conditioner onto your palm. Rub your hands together and massage into the skin and hair, removing any excess with a moist towel. Allow essential oil fragrance to bloom and cool the skin for a soothing, aromatic shaving experience.
- Grip the razor. Two fingers in front, two in back, with the thumb underneath. Use a firm but gentle grip, like a handshake. At the end of the day, the grip that works is the right one, but this is a good place to start. When you put the blade to your skin, keep it moving and use an angle 15-30 degrees off your skin. This should go without saying, but: no slicing motions!
- Think back to your "zones". Maybe they are the front of the shin, back of the calf, sides of the knees, front of the knee, back of the knee, etc. Choose one "zone" and lather using swirling motions. Next, use a "painting" motion to smooth out the lather. Leave the rest of your zones without lather.
- Gently pull the skin tight. This creates a firm surface for the razor to cut the hair against and will result in a smoother shave. You can also pull your skin in different direction to shave hard-to-reach areas like around the knee or ankle. If your skin is too slippery to pull effectively, you can swipe your fingers on an alum block to make them stick better.
- The First Pass. Start with the flat areas, pulling the skin tight and shaving in the direction of hair growth in short, controlled strokes. If this goes well, proceed to the shin, around the ankle, and around the knees. Lather one zone at a time and work up to trickier spots. If some hairs are left behind, don’t worry, you can get them on the next pass after you re-lather.
- Rinse, Re-lather, Second Pass. Shaving only where there is lather minimizes irritation and give better results. Shave with the grain or across the grain for a closer second pass, catching any hair you may have missed.
Clean Up
- Damage Control (as needed). Stay calm. You can do this. Shaving nicks can bleed a lot and always look worse than they actually are. Straight razors are very sharp and make clean cuts, so this also means they tend to scar less than other razor nicks! Accidents do happen, so if you suddenly see crimson mixing with your shaving lather, take a moment to rinse the offending wound with cool water and apply alum or a styptic match to disinfect; apply pressure to stop the bleeding. Then, if you’re up to the task, shake it off and start the shave again with a fresh lather.
- Apply Aftershave (recommended). Shaving removes the topmost layer of skin, exposing it to the elements and a higher risk of infection. Aftershave is an important last step to disinfect, close pores, cool and tighten your skin for a clean, refreshing finish. Aftershave can take many forms. They all work, so the choice is entirely personal.
- Strop the Straight Razor. Completely drying the razor, stropping it a few times, and applying a drop of oil will assure that it is clean and ready for the next shave.
Nailed it!
You just completed your first straight shave! It may not be the closest shave of your life, but don’t worry. Take pride in the process and in your progress. Straight shaving takes time and practice to master, but enjoy it and learn to ditch the "let's-just-get-this-over-with" feeing a cartridge razor creates in the pit of your stomach! By having the right gear and practicing, you are already ahead of the curve and on your way to your best shave ever!